Showing posts with label Construction. Show all posts

Monday, November 21, 2022

OCR Progress Update

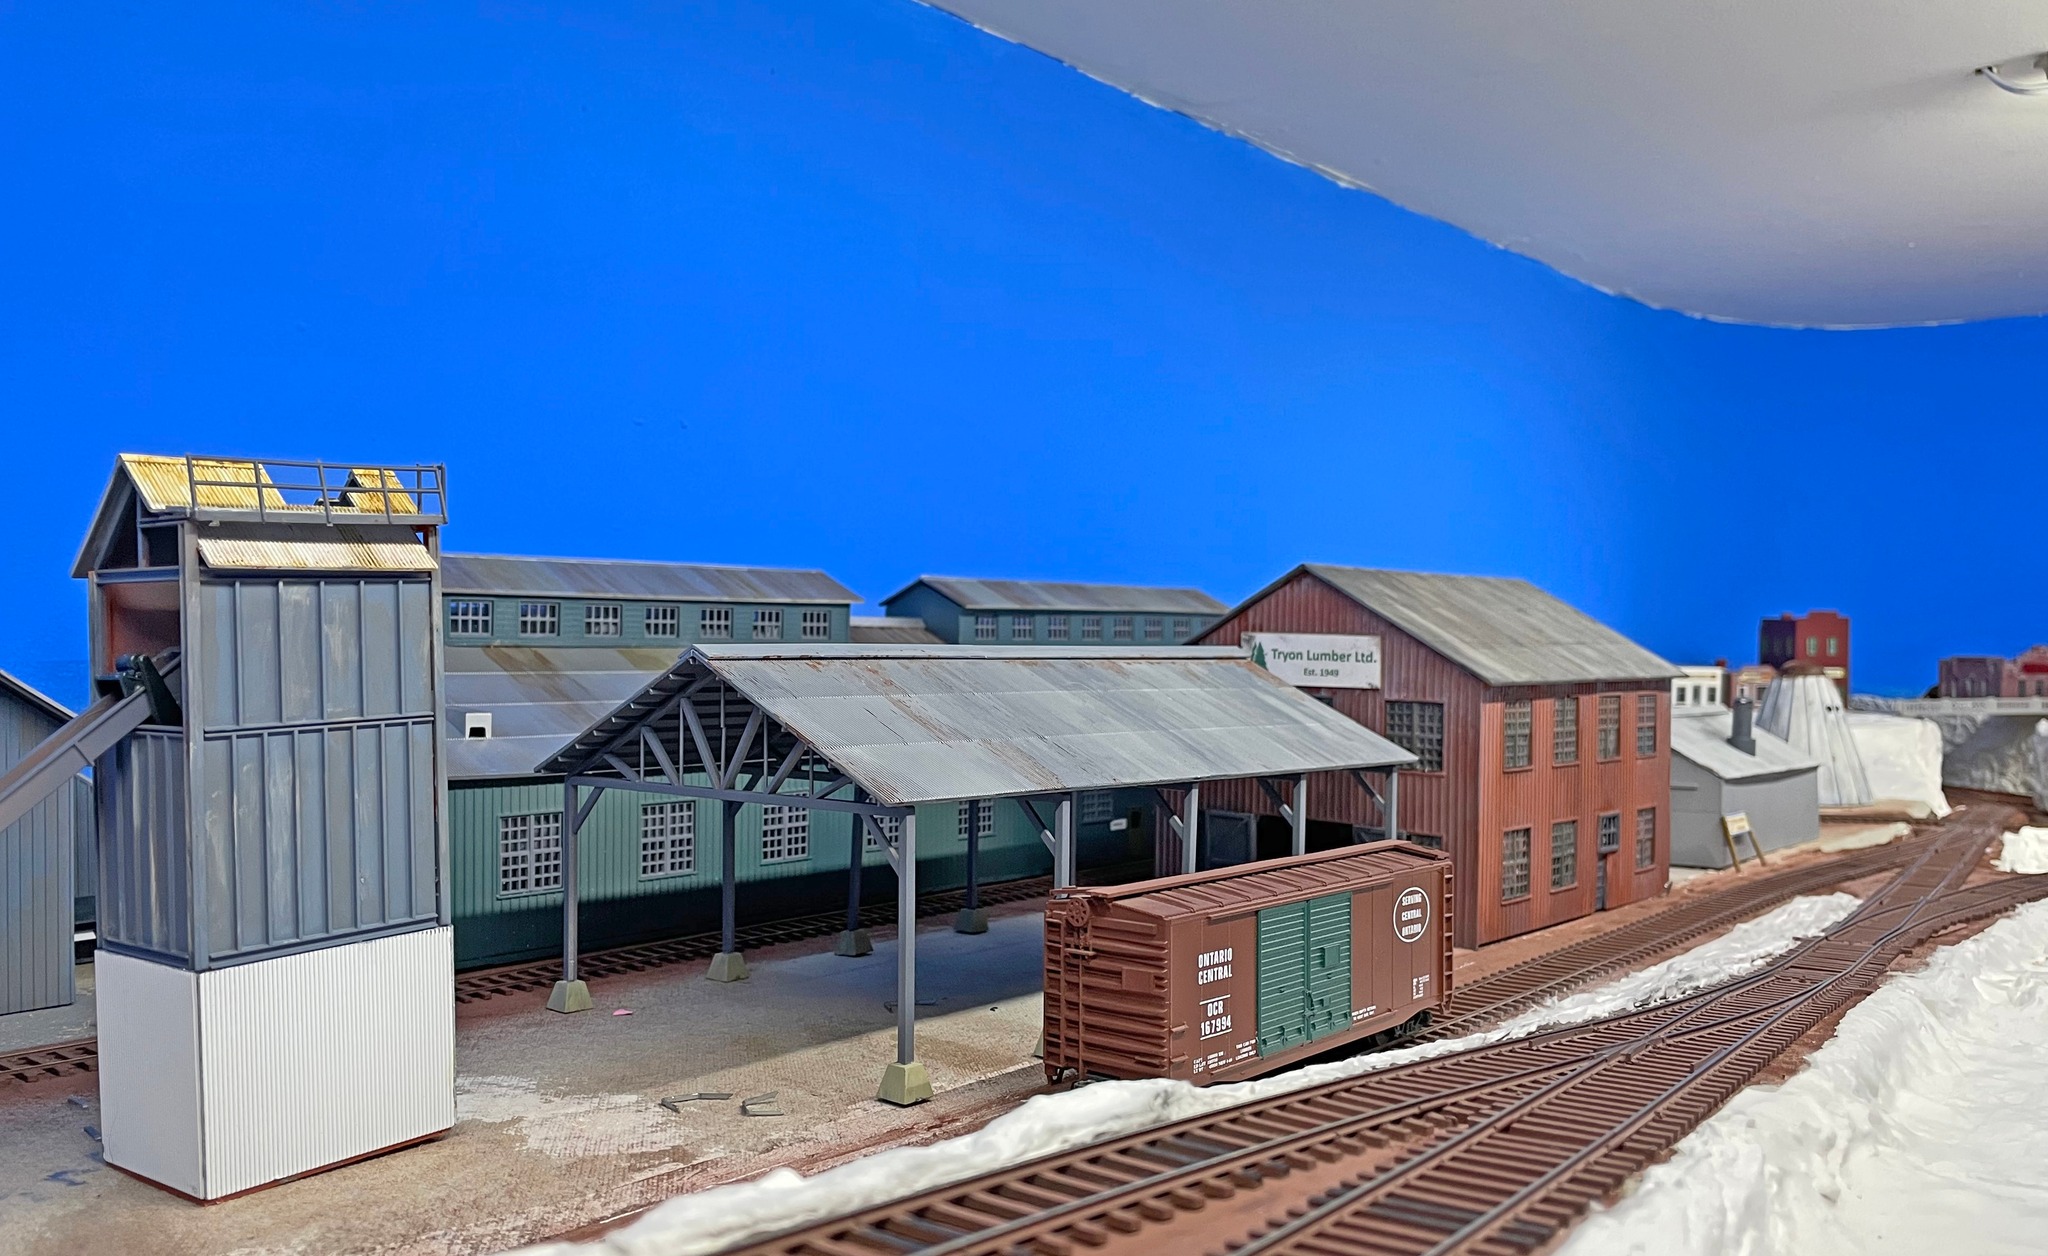
As some of you know, I'm lucky enough to be part of the scenery crew for my friend Bram Bailey's Ontario Central Railway. Bram and I share a common interest in Ontario railroading, especially the Ontario Northland Railway. Most of the crew heads to Bram's every Wednesday evening and some Saturdays to work on the layout. However, I live about an hour east, so rather than drive all those miles for each work session I focus on building structures at my work bench. Bram provides me a box of goodies, consisting of kits and other supplies, plus a template of the space available.  I have pretty much free choice on what I can do, such as kit bashing, paint colors, weathering, details and creating signage for business or structure.  So building usually starts with a few hours of research to see what sort of modifications I feel may be needed and to get an idea of paint schemes based on the prototype.  All of which gets documents in my OCR notebook. Then it's off to the work bench. As building progresses, I check each structure against the plan and clarify any questions with the Superintendent of the OCR. Once completed, I return the structure and the scenery crew then creates the final scene down the road.  I keep most of the leftover parts in case they are needed for future builds as you never know what may look good on another stock kit

Here are some recent examples of completed kits. 

Groner's Grain Elevator is named for a friend of Bram's who's vocation is that of a farmer. It is located at Elizabeth Bay.
Tryon Lumber is named for Bram's uncle Reg Tryon, who lived in Bracebridge, ON and worked most of his career in the lumber industry.

Zabrecky Fuel is a Husky Fuel and Propane distributor named after some of Bram's friends.

Monday, March 22, 2021

Yard Building

With the pandemic still in full lockdown mode, I finally got the time to build a small yard and retire a small temporary yard I had built years ago.  The new yard is 10 feet long and sits on two modules which are joined together.

As I was planning my new yard, which was to be situated at the end of the layout, I wanted to include some sort of yard office, as well as a freight shed that had been removed from a different part of the layout. Looking at some photos, I realized that I had enough room to make a fairly complete scene by using the Mechanical Building at Englehart as an example. The other side of the track would house my freight shed.

Drone view courtesy Mike Robin

South side of Bldg; scale house in right foreground

South side of Bldg

North and east walls of the Bldg

The build started with a general Pikestuff building kit, with a few extra side panels added and cut down in height to make a lower roofline. Unfortunately I only had photos of 3 sides of the building, and the pandemic cancelled two trips I had planned to get the info. So the west wall is a complete guess.

One detail that I noticed going back through several years of photos was that the roof and building sides have two different shades of blue, as well as downspout configurations. Perhaps due to a building expansion? Matching the weathering condition and color was a real challenge and although not a true match, the result is pleasing to my eye. Maybe I'll try to alter it at some later date.

One of the challenges was to match the various windows and their position on the wall without any true measurements.  Cutting the doors and windows would turn out to be fairly time consuming, as the Pikestuff panels are fairly thick plastic and required a steady hand and many knife blades to cut them all.

The challenge now is to complete the scene in the background by adding all of the details that you see in the upper photo.  I just finished building the small building directly behind the main structure, as well as removed the trucks from an old Athearn 40 foot ONR boxcar which has been parked in the weeds.

The gravel type pavement was created by pouring tile grout to the consistency of a slushy and then drawing it relatively flat and level across the area.   I plan to weather some of the gravel area with pan pastels to give it more of a well worn look.  Now I just have to find or build the suitable ONR service vehicle(s) to park outside of the building.


Monday, January 18, 2021

New Yard

 As I discussed in a previous entry, I had decided that the railroad really needed a much larger yard. The old yard was an afterthought and once I started operating from it, I realized its limitations.  Therefore, after some review, I opted to build two new modules, which totaled 10 ft in length. 

The Yard consists of a 5-track receiving yard using the Micro-Engineering ladder turnout system, a main line, plus two ready tracks for either building a train or taking one apart. So a total of 8 lines.  The last spur on the ladder will be storage for my vans.  Since the yard was planned to connect to an adjacent two-line module, an extra turnout was added to connect all tracks and make the yard accessible from two tracks. I don’t have room to make a ladder on both ends of the yard, which is a limiting factor, but when you’re out of real estate, you're out of luck until you can move into a different house.  Maybe the next house will allow for about a 20ft yard or larger.

After several weeks of laying cork and track, it was finally time to wire it.  Now I don't mind wiring, however, being under the layout night after night can be touch on the body, especially the eye sight.  However, I pressed on and wiring was completed late Saturday evening. Tested each track using several different engines and all was good. The final steps would be weathering the track and adding ballast. Started to weather the track at about 0100 Sunday using the paint pens I had purchased years ago. The plan was to avoid spraying all of the track and just apply some rust or grime to the sides via the pen method.  All good and I got two tracks done before realizing that it was late and I was running out of energy to complete.  Next morning I started to finish the weathering and actually loaded the yard with every caboose or van in Ontario Northland terms that I own, plus about a dozen freight cars.  Success!!! Completed the task by installing some ground throws.


This week I will start on some scenery work. I still need lots of cinder ballast to complete the track work and adjacent areas.  The green foam and sculptamold shown on the left side of the photo will become scrub grass and weeds, as well as some new trees to make a barrier for the module and regular basement storage items.


Saturday, January 9, 2021

Here we grow again !!!

 2020 has been the year of the pandemic, which has seen model railroad show after show cancelled, as well as friends operating sessions put on hold.  However, for those in this hobby it has also allowed more time to work on the layout or build some models, as there just wasn't much out-of-doors socializing going on and working from home became the safest way to avoid the virus.  I took the opportunity to paint and decal various pieces of rolling stock, work on some general scenery and more.

I kept looking at the layout and wondering how I could build a bigger yard as well as add a few more industries.  While I had built a small yard next to my work bench, the optimal word was that it was small and had become a bottleneck for moving traffic.  In my mind it came down to two solutions: 1) build a second level above the island which houses the paper mill and lumber mill (via the addition of a helix) or 2) tear out some areas and build some new modules that would allow a larger yard and possibly some industries. Thus began a review and evaluation of what I really wanted the layout to finally look like, as this is realistically the final time I will be able to expand into basement space used for other purposes. During some recent plumbing problems, I heard the message that my hobby has taken up too much of the basement.  I will say that the plumber seemed to like my railroad, as on his second trip to the house in 6 months he was heard to remark "oh the house with the model trains. I'd like to see them running".

Adding a second level was problematic for two reasons. The first being that I would have to move my island area outward from its position, so that I could add lateral supports to the 2x4 framing that was used to construct them. While I could move the modules and install another set of vertical supports followed by horizontal supports to lay the upper level on, there was a pesky metal column support for the steel beam which supports the house in the way.  The other issue with this modification would be the need to construct of a real estate eating helix.  Using a 30-inch radius, I would easily end up with a helix that was close to 6 ft in diameter. Lots of wasted space there and I have already torn out a helix about 5+ years ago due to its wasted space.  Definitely not high on my priorities to go through the exercise again, although I had saved all of the hardware from the previous helix.. 

Building new modules also came with a few problems. First and foremost would be that the space for the Nephton mine complex would have to be changed.  Actually it turns out that it would be lost. While hated to lose this industry, especially since I have built a fair number of rolling stock to support it, it simply wouldn't fit. So all buildings have been boxed up for its construction in the next version of the layout.

On the plus side, several months after starting my review process, fellow Freemo modeler Tim Moran got in touch and said he had a couple of 45 deg modules that he would be parting with. A quick email and Tim and I were arranging to meet at the local Walmart parking lot complete with our Covid19 masks in and put them into the back of my car. So parts of a previous 2x4ft module were re-built, becoming a new small rural Ontario town complete with grain elevator business, and this new modules spliced between the two 45's. Although still unnamed and in need of some details, a number of wooden buildings have found a new home of the layout.  

Trackage and wiring completed...on to scenery

One step closer, I still needed to build some modules for a new yard.  But wait, nice weather days in November allowed me to do that. Therefore, yard construction will be included in a new blog entry.

 

Friday, July 24, 2020

Pontypool / Cargill Construction

When I decided to change the layout to install a new yard, I ripped out a previous corner that was basically finished with scenery, which is always difficult to do. However, I rationalized that it was basically a corner that was doing nothing for the revenue stream for the railroad and it might actually enough space to add two rural industries.  The first spur was set aside to hold an elevator that I had built years before to mimic the elevator at Pontypool, ON.  The elevator is located along the CP Rail line and is about 25 miles SW of Peterborough. The Pontypool elevator was constructed in 1918, and was unique as the base was constructed from cement while the upper portion was the typical wood construction.  It was also unique in that the sides of the elevator were covered by cedar shakes.  A store and office, which disappeared in the 70's or maybe even before, had historically been present.  You can still see the outline of the building roof where it attached to the elevator if you look hard enough.  Remnants of the foundation can also be found if you take a closer look through the grass and weeds.  The current structure, which has not seen any signs of life for 40+ years actually replaced the original elevator built in 1894.  The original purpose for the Pontypool elevator was to store barley, wheat and oats in the days of horse and buggy. These products where shipped to Toronto and Montreal by CPR train. As the elevator expanded its services, the first power line to Pontypool came to the elevator and later the first diesel generator in the area was added to grind crops for the farmers. As farms expanded and the transportation system improved, farmers were able to store their own grain and have it trucked to larger elevators.  From what I have researched, it was a Parrish & Heimbecker Ltd elevator.
1977, Kawartha Lakes Public Library


While no longer in service since the 70's, this elevator has always a fascination for me due to its construction. I hope someday that some group will restore it before the termites find it.  Several years ago I decided to scratch build the elevator using the plans from Campbell as a general guide.  The hardest part of the build was fabricating molds for each of the cement walls. Some day I'll detail that process.  I also need to change the cedar siding as I used a commercial product and was not thrilled with the results.  Unfortunately after the structure was built, I really didn't have a good place for it on the layout and it was boxed up. So it has been moved many times and sustained some damage since I didn't pack it well enough.

The former trackage and elevator were fit into the corner and at some point in the future I will paint the track into the backdrop.  But for now the modeled area will serve as storage for cars or simply sit empty.


The second addition to this area is a fertilizer supply business.  This was modeled after the Cargill facility in Mount Elgin, Ontario (Mile 7.7 Port Burwell Sub).  While I don't know much about the former operation (Cargill stopped using this building roughly 6-8 years ago), I came across it while railfanning the Ontario Southland and thought it would be interesting to model some day.  I have modified the structure and placed it up in the clay belt of Ontario so the that the ONR can service it.  While I would have liked to model it as is, once I started to draw up plans I realized that I would have to significantly compress it.  So I have ended up with two buildings, but only support one conveyor tower instead of the two the prototype has.   

Conveyor partially completed

Bldg #2 with completed conveyor set in place

My buildings are primarily scratch built, although some of the components have come from the Walthers Saw Mill buildings and a Rix grain system. Building 1 came from a different part of the layout and was repainted to match the Mount Elgin facility. The 2nd building was scratch built, although I had to compress part of it and omit the 2nd elevator. I hope to add the 2nd conveyor in the future, especially since it has the very prominent Cargill logo painted towards the top and I have the conveyor parts.  The roof was the toughest part of the build, as I had to add more supports that I originally thought were necessary and forgot to take into account that the styrene roofing that was purchased had no real strength and buckled and warped enough to make installation difficult.
Completed building (sort of). Amazing how the photo shows me a few errors and omissions that I have yet to address

The Cargill facility is now open for business, as new track has been laid and the building has been set into the scene.  While many details still need to be added to the building and the scene, I'm pleased with the outcome and it's time for this part of the layout to start receiving cars.